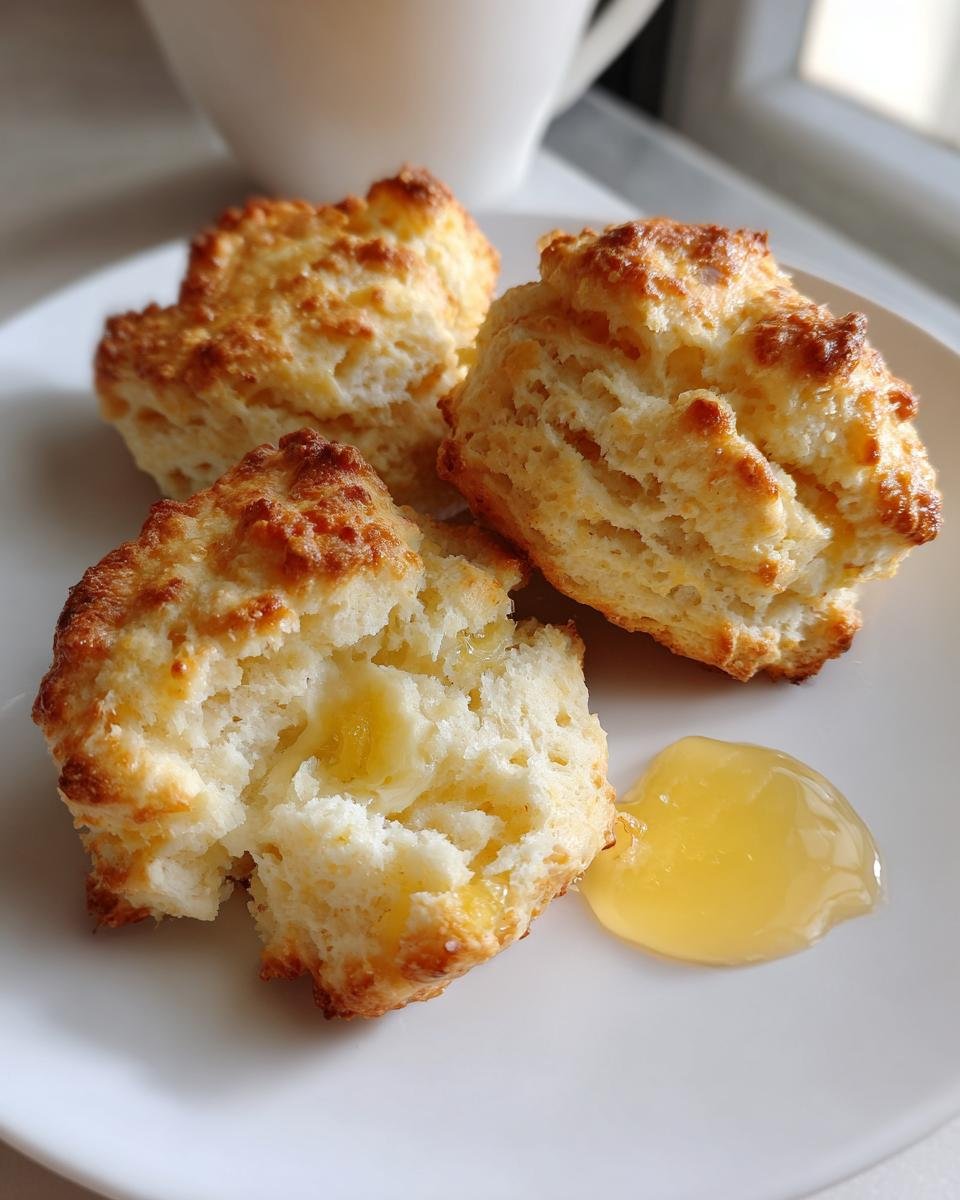
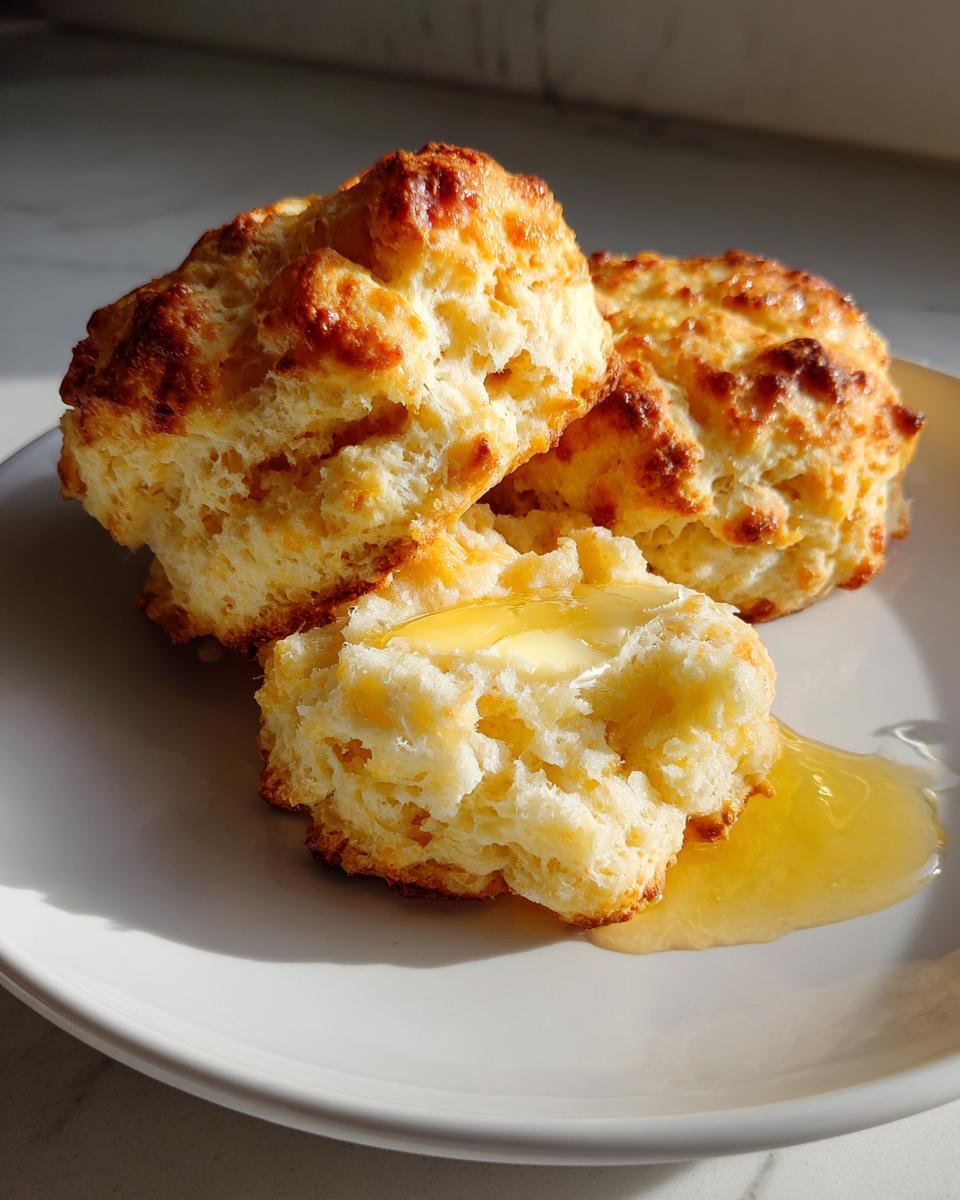
Oh, gluten-free baking – it used to intimidate me too! But trust me, these Gluten-Free Buttermilk Drop Biscuits will change everything. They’re so soft and fluffy, you’d never guess they’re missing regular flour. I remember the first time I made them – my kitchen smelled like Sunday mornings at Grandma’s house, and that first buttery bite? Absolute magic.
The best part? No fancy techniques here. Just dump, stir, drop, and bake. In under 30 minutes, you’ll have warm biscuits ready to soak up gravy or slather with jam. Even my gluten-loving husband can’t tell the difference – and that’s saying something!
Why You’ll Love These Gluten-Free Buttermilk Drop Biscuits
Let me tell you why these biscuits became my go-to recipe (and why they’ll become yours too!):
- No rolling pin needed – Just scoop and drop the dough. No fuss, no mess, no extra cleanup!
- Ready in under 30 minutes – From bowl to table faster than you can say “buttery goodness”
- That perfect fluffy texture – Crispy golden tops with soft, tender centers that practically melt in your mouth
- Gluten-free without compromise – Even my pickiest eaters can’t tell they’re missing regular flour
- Endlessly versatile – Perfect for breakfast with jam, dinner with stew, or just snacking straight from the oven
Seriously, these biscuits are life-changing for anyone who thought gluten-free meant dense or dry. One bite and you’ll be hooked!
Ingredients for Gluten-Free Buttermilk Drop Biscuits
Okay, let’s talk ingredients – and I mean exactly what you’ll need for these perfect biscuits. After dozens of test batches (my neighbors got very spoiled), I’ve nailed down the magic combination:
- 2 cups gluten-free all-purpose flour – My go-to is Bob’s Red Mill 1-to-1 Baking Flour (the blue bag!) because it already has xanthan gum mixed in. No guessing games!
- 1 tablespoon baking powder – Make sure yours is fresh – old baking powder is the silent killer of fluffy biscuits
- 1/2 teaspoon baking soda – This reacts with the buttermilk to give us that beautiful rise
- 1 teaspoon salt – Trust me, don’t skip this – it balances all the flavors
- 1/2 cup cold unsalted butter – Cubed and straight from the fridge (I’ll explain why cold matters so much later!)
- 1 cup buttermilk, chilled – The real deal, none of that powdered stuff. Pro tip: shake the carton well before measuring!
See? Nothing weird or hard-to-find. Just simple ingredients that work together like a dream. Now let me tell you why each one matters so much…
Equipment You’ll Need
- Large mixing bowl
- Whisk
- Baking sheet
- Parchment paper
- Measuring cups and spoons
- Spoon or cookie scoop
How to Make Gluten-Free Buttermilk Drop Biscuits
Alright, let’s get baking! These biscuits come together faster than you can say “pass the butter,” but there are a few key steps that make all the difference. Follow along – I’ll walk you through each one like I’m right there in your kitchen with you!
Step 1: Preheat and Prep
Crank that oven to 450°F (230°C) – yes, hot! While it heats up, line your baking sheet with parchment paper. No greasing needed – the parchment gives just enough slide for perfect golden bottoms without sticking. Trust me, I learned this the hard way after scraping off one too many biscuits!
Step 2: Mix Dry Ingredients
Grab your biggest bowl (I always use my grandma’s old yellow mixing bowl for luck) and whisk together the flour, baking powder, baking soda, and salt. Really whisk it – we want those leaveners evenly distributed so every biscuit rises beautifully. You’ll see little flour clouds puff up – that’s how you know you’re doing it right!
Step 3: Cut in the Butter
Here’s where the magic starts! Drop in those cold butter cubes and work them in with your fingertips or a pastry cutter. You’re aiming for pea-sized crumbs – some bigger chunks are actually good! The cold butter will create steam pockets as it bakes, giving us those flaky layers. Work quickly though – we don’t want warm hands melting our butter!
Step 4: Add Buttermilk
Pour in that chilled buttermilk all at once and stir gently with a fork just until the dough comes together. It’ll look shaggy and uneven – perfect! Overmixing is the enemy of tender biscuits. I always stop when I still see a few dry streaks – they’ll disappear as the dough rests.
Step 5: Bake to Perfection
Scoop generous spoonfuls (about 1/4 cup each) onto your prepared sheet – they can cozy up close since we’re not rolling them out. Pop them in the oven and resist opening the door! In 12-15 minutes, you’ll have golden-brown tops with crispy edges and fluffy centers. The smell? Pure heaven. Let them cool just enough so you don’t burn your fingers, then dig in!
Tips for Perfect Gluten-Free Buttermilk Drop Biscuits
After burning through more flour than I’d like to admit (and eating all my “experiments”), here are my hard-won secrets:
- Chill sticky dough for 5 minutes – If your dough feels too wet, a quick fridge break makes it easier to handle
- Spoon and level your flour – No scooping straight from the bag! Too much flour = hockey pucks
- Leave those lumps alone – Resist the urge to smooth out your dough drops – rustic shapes bake up fluffiest
- Use frozen butter in summer – When it’s hot out, I grate frozen butter for perfect pea-sized crumbs
- Bake high and fast – That 450°F blast gives us maximum rise before the outside overbakes
Follow these, and you’ll have people begging for your “secret” recipe – promise!
Variations and Substitutions
Oh, the fun part – making these biscuits your own! Here are my favorite twists that still deliver perfect results every time:
- Dairy-free? No problem! Swap buttermilk for 1 cup almond milk + 1 tablespoon lemon juice (let it sit 5 minutes to “sour”). Use vegan butter sticks instead of dairy butter – just keep them ice-cold!
- Herb lovers – Toss in 2 tablespoons chopped fresh chives or rosemary when mixing dry ingredients. My Thanksgiving version has sage – heavenly with turkey gravy!
- Cheese please – Fold in 1/2 cup shredded sharp cheddar for cheesy pull-apart goodness. Aged gouda works magic too!
- Sweet tooth? Add 2 tablespoons honey to the buttermilk and sprinkle tops with cinnamon sugar before baking. Divine with coffee!
- No buttermilk? Regular milk works in a pinch – just add 1 extra teaspoon baking powder to compensate for less acidity.
The beauty of this recipe? It’s like your favorite jeans – comfortable as-is but easy to dress up for any occasion!
Serving Suggestions
Oh, the possibilities! These biscuits are like edible sponges ready to soak up all your favorites. My Sunday ritual? Split them warm and slather with honey butter while they’re still steaming. For dinner, they’re begging to cradle chicken stew or get smothered in sausage gravy. Breakfast calls for strawberry jam – the kind with big, chunky berries that ooze into all those nooks and crannies. And don’t even get me started on how they elevate leftover turkey sandwiches…
Storing and Reheating Gluten-Free Buttermilk Drop Biscuits
Now, I’ll be honest – these biscuits rarely last long enough to need storing at my house! But when they do (miracle of miracles), here’s how to keep them tasting fresh-baked:
Room temperature storage: Once completely cooled, tuck them into an airtight container with a paper towel underneath to absorb any moisture. They’ll stay delicious for about 2 days – if you can resist them that long!
Freezing is your friend: These biscuits freeze like a dream! Wrap each one individually in foil, then pop them all into a freezer bag. They’ll keep their magic for up to 3 months. My freezer always has a stash for last-minute cravings.
Reheating secrets: For that just-baked taste, unwrap frozen biscuits and place directly on a baking sheet in a 350°F oven for 10-12 minutes. Room temp ones just need 5 minutes to wake up. Microwave works in a pinch (15-20 seconds), but the oven gives you back that crispy exterior.
Pro tip: Split cold biscuits before reheating – they’ll warm through faster and you get more surface area for butter melting action. You’re welcome!
Nutrition Information
Now, I’m no nutritionist (just a biscuit enthusiast!), but here’s the nutritional breakdown per biscuit based on my usual ingredients. Remember – these are estimates, and your exact numbers might dance around a bit depending on your specific flour blend or butter brand!
| Nutrition Facts | Per Biscuit |
|---|---|
| Calories | 150 |
| Total Fat | 8g |
| Saturated Fat | 5g |
| Trans Fat | 0g |
| Cholesterol | 20mg |
| Sodium | 300mg |
| Total Carbohydrates | 18g |
| Dietary Fiber | 2g |
| Sugars | 1g |
| Protein | 3g |
A little note from my kitchen to yours: These numbers don’t account for that extra pat of butter you’ll inevitably slather on top (I see you!), and honestly? Some things are worth every delicious calorie. Enjoy your biscuits guilt-free – life’s too short to skip the good stuff!
Common Questions About Gluten-Free Buttermilk Drop Biscuits
I’ve gotten so many great questions about these biscuits over the years – let me share the ones that come up most often (along with all my kitchen-tested answers)!
“Why does the butter need to be so cold?”
Oh honey, this is the golden rule! Cold butter creates little steam pockets as it melts in the oven – that’s what gives us those dreamy flaky layers. If the butter gets warm before baking, you’ll lose that lift and end up with dense biscuits. My trick? I actually chill my mixing bowl for 10 minutes before starting. Works like a charm!
“Can I make these ahead and freeze them?”
Absolutely! These biscuits are freezer champions. I always make a double batch – bake them all, let them cool completely, then wrap each one individually in foil. Toss them in a freezer bag, and they’ll stay perfect for up to 3 months. When biscuit cravings strike (and they will), just pop them frozen right into a 350°F oven for 10-12 minutes. Good as fresh!
“My dough seems too sticky – what did I do wrong?”
Don’t panic! Gluten-free flours can vary in absorption. If your dough feels like it’s sticking to everything, just chill it for 5-10 minutes – the flour will hydrate more evenly. And remember: sticky dough makes the fluffiest biscuits! Resist the urge to add extra flour. Instead, wet your hands slightly when shaping, or use an ice cream scoop for perfectly portioned drops.
“Can I use regular milk instead of buttermilk?”
You can, but you’ll miss that tangy magic! The acid in buttermilk reacts with the baking soda to give us that beautiful rise. In a pinch, make “sour milk” by adding 1 tablespoon lemon juice or vinegar to 1 cup regular milk and letting it sit for 5 minutes. It’s not quite the same, but it’ll do in emergencies! For more on the science of baking, check out this guide to leavening agents.
“Why didn’t my biscuits rise as much as yours?”
Ah, the heartbreak of flat biscuits! Usually it’s one of three things: old baking powder (check that expiration date!), overmixed dough (stop at shaggy!), or an oven that wasn’t hot enough. Next time, try placing your baking sheet on the middle rack and don’t peek for at least 10 minutes – that blast of heat is crucial for maximum puff! Understanding how your oven works is key to baking success; you can learn more about using your oven here.
Got more questions? Slide into my DMs anytime – I could talk biscuits all day! You can also check out our about page for more about our baking journey.
Print30-Minute Gluten-Free Buttermilk Drop Biscuits Are Magically Fluffy

Easy gluten-free buttermilk drop biscuits that are soft, fluffy, and perfect for any meal.
- Prep Time: 10 minutes
- Cook Time: 15 minutes
- Total Time: 25 minutes
- Yield: 12 biscuits 1x
- Category: Bread
- Method: Baking
- Cuisine: American
- Diet: Gluten Free
Ingredients
- 2 cups gluten-free all-purpose flour
- 1 tablespoon baking powder
- 1/2 teaspoon baking soda
- 1 teaspoon salt
- 1/2 cup cold unsalted butter, cubed
- 1 cup buttermilk, chilled
Instructions
- Preheat oven to 450°F (230°C). Line a baking sheet with parchment paper.
- In a large bowl, whisk together flour, baking powder, baking soda, and salt.
- Cut in the cold butter until the mixture resembles coarse crumbs.
- Stir in the buttermilk until just combined.
- Drop spoonfuls of dough onto the prepared baking sheet.
- Bake for 12-15 minutes or until golden brown.
- Serve warm.
Notes
- Use cold ingredients for fluffier biscuits.
- Do not overmix the dough.
- Store leftovers in an airtight container for up to 2 days.
Nutrition
- Serving Size: 1 biscuit
- Calories: 150
- Sugar: 1g
- Sodium: 300mg
- Fat: 8g
- Saturated Fat: 5g
- Unsaturated Fat: 2g
- Trans Fat: 0g
- Carbohydrates: 18g
- Fiber: 2g
- Protein: 3g
- Cholesterol: 20mg
Keywords: gluten-free, buttermilk, biscuits, easy, homemade

